How to change PC name of Windows 10
Change PC name of Windows 10
There are many reasons for which we want to change our PC name, it may be for connecting homegroups, To send or receive files Using Bluetooth or To link Android or iPhone devices to PC. We always wonder PC with a short name that is cool and easy to Remember. So here you will find step by step guide on how you can change the PC name of Windows 10, and it’s easy to change the name. Only you need to follow the below steps ‘How to change computer name windows’. So, let’s get started.
Step 1. Go to ‘Windows settings’.
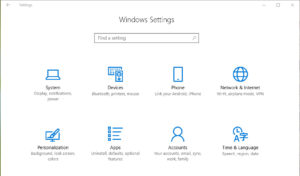
Step 2. Click on ‘System’ settings.

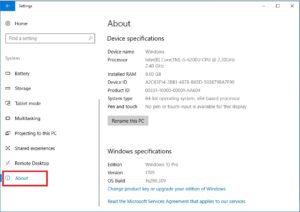
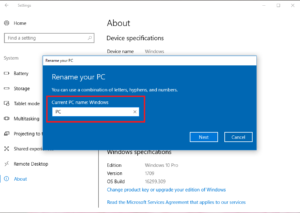
Step 3. Now click the ‘About’ option.
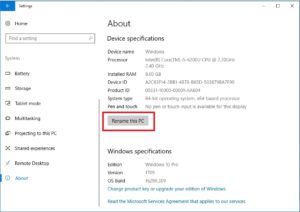
Step 4. You’ll find a button with ‘Rename this PC’, just click here.
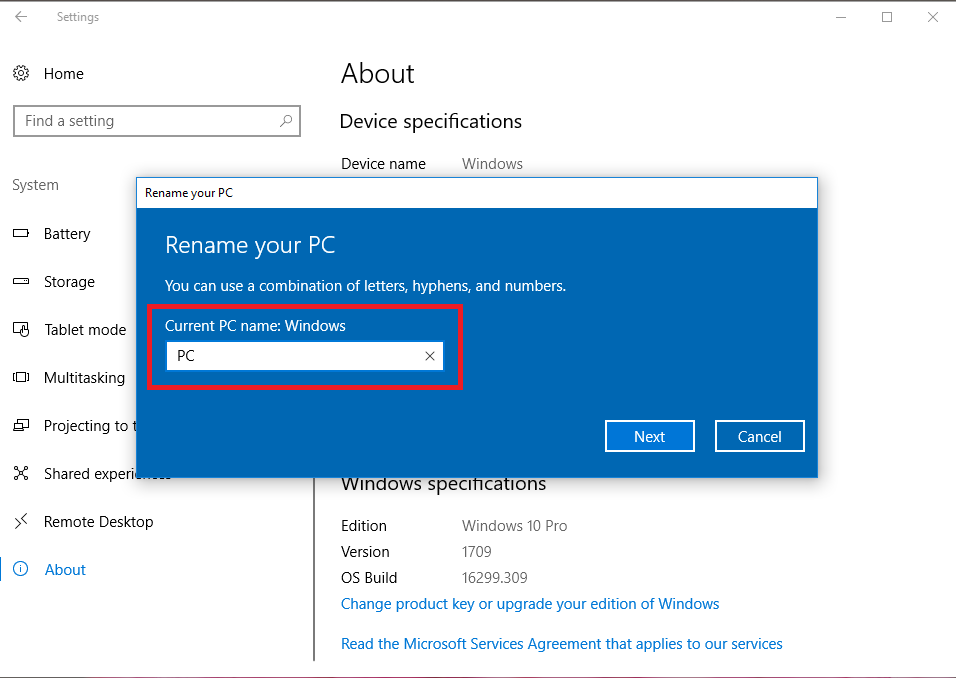
Step 5. Enter the new name of your PC and click Next.
Step 6. After you restart, Your PC name will change. Click the ‘Restart now’ button If you want to the changes take place immediately or Click ‘Restart later’ Button so, the changes will take place After you restart your PC Next time.

Also Read: Best New Features of Windows 10 Creators Update
That’s It. In this way, you can change the PC name of Windows 10.
Liked the article? Share It.


0 Comments